
Circuit Components
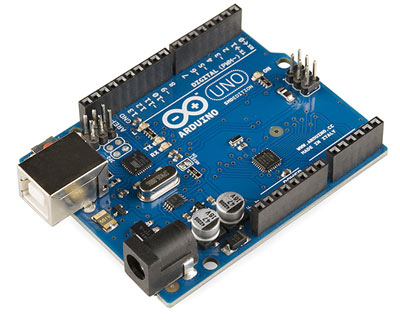
Arduino
In this project we have used a microcontroller to control whole the process of system that is ARDUINO board. Actually arduino is not a mere controller as it has an operating system or boot-loader which runs on AVR controllers. Arduino is an open source hardware platform and very useful for project development purpose. There are many types of arduino boards like Arduino UNO, arduino mega, arduino pro mini, Lilypad etc. are available in the market or you can also build one by yourself.
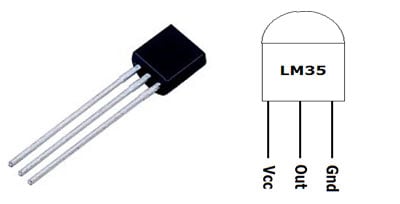
LM35 Temperature Sensor
LM35 is a 3 pin temperature sensor which gives 1 degree Celsius on every 10mVolt change. This sensor can sense up to 150 degree Celsius temperature. 1 number pin of lm35 sensor is Vcc, second is output and third one is Ground.
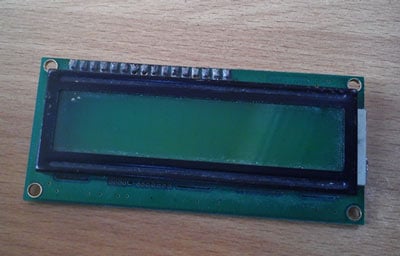
LCD
16x2 LCD unit is widely using in embedded system projects because it is cheap, easily availablet, small in size and easy to interface. 16x2 have two rows and 16 columns, which means it consist 16 blocks of 5x8 dots. 16 pin for connections in which 8 data bits D0-D7 and 3 control bits namely RS, RW and EN. Rest of pins are used for supply, brightness control and for backlight.
Power Supply
Arduino Board already have an inbuilt power supply section. Here we only need to connect a 9 volt or 12 volt adaptors with the board.
Circuit Diagram and Explanation
Circuit digram for digital thermometer using Arduino LM35 temperature sensor, is shown in the above figure. Make the connections carefully as shown in the schematic. Here 16x2 LCD unit is directly connected to arduino in 4-bit mode. Data pins of LCD namely RS, EN, D4, D5, D6, D7 are connected to arduino digital pin number 7, 6, 5, 4, 3, 2. A temperature sensor LM35 is also connected to Analog pin A0 of arduino, which generates 1 degree Celsius temperature on every 10mV output change at its output pin.
Arduino LM35 Code & Explanation
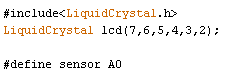
To write the code for digital thermometer, we need to write the code for Arduino, LM35 Temperature Sensor, and 16x2 LCD module interfacing. First we include library for LCD unit and then we defines data and control pins for LCD and temperature sensor.
Ex:
After getting analog value at analog pin we reads that value using Analog read function and stores that value in a variable. And then by applying given formula converts it in temperature.
float analog_value=analogRead(analog_pin);
float Temperature=analog_value*factor*100
where
factor=5/1023
analog_value= output of temperature sensor
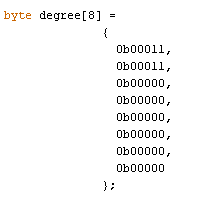
Here degree symbol is creates using custom character method
Code
/ * ----------- Arduino LM35 Code ------------- * /
/ * ----------- Digital Thermometer Using Arduino ------------- * /
#include <LiquidCrystal.h>
LiquidCrystal LCD (7,6,5,4,3,2);
#define sensor A0
byte degree [8] =
{
0b00011,
0b00011,
0b00000,
0b00000,
0b00000,
0b00000,
0b00000,
0b00000
};
void setup ()
{
lcd.begin (16,2);
lcd.createChar (1, degree);
lcd.setCursor (0,0);
lcd.print ("Digital");
lcd.setCursor (0,1);
lcd.print ("Thermometer");
delay (4000);
lcd.clear ();
lcd.print ("Circuit Digest");
delay (4000);
lcd.clear ();
}
void loop ()
{
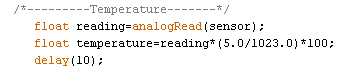
/ * --------- Temperature ------- * /
float reading = analogRead (sensor);
float temperature = reading * (5.0 / 1023.0) * 100;
delay (10);
/ * ------ Display Result ------ * /
lcd.clear ();
lcd.setCursor (2.0);
lcd.print ("Temperature");
lcd.setCursor (4,1);
lcd.print (temperature);
lcd.write (1);
lcd.print ("C");
delay (1000);
}


No comments