
Pushbuttons
Introduction
Overview of Pushbuttons
A pushbutton is a fundamental component in electronics, serving as a simple yet effective interface between the user and the electronic device. Pushbuttons are widely used in various applications, from simple household gadgets to complex industrial systems. They provide a straightforward way to control electrical circuits, often acting as the first point of interaction for a user with an electronic system. Understanding how pushbuttons work is essential for anyone starting in electronics, as they are one of the most basic and commonly used components.
Pushbuttons are designed to be easy to use and reliable, making them ideal for applications where user input is required. They come in various shapes, sizes, and configurations, each suited to specific tasks. The simplicity of a pushbutton's operation—pressing it to complete or break a circuit—makes it an indispensable tool in electronic design.
Importance of Pushbuttons in Electronics
Pushbuttons play a crucial role in electronics because they provide a reliable and user-friendly method for controlling circuits. In many devices, the pushbutton is the component that initiates an action, such as powering on a device, starting a machine, or sending a signal. The importance of pushbuttons cannot be overstated, as they are often the first point of contact between a user and the device.
In electronic circuits, pushbuttons can be used to control various functions, including turning devices on or off, resetting systems, activating specific features, or triggering events in a sequence. Their versatility and simplicity make them an essential component in both simple and complex electronic systems.
Real-Life Examples
Pushbuttons are found in almost every aspect of daily life, from household appliances to industrial machinery. Here are a few examples of where pushbuttons are commonly used:
Remote Controls: Each button on a remote control is a pushbutton that sends a specific signal to a device, such as a TV or stereo system.
Doorbells: A classic example of a pushbutton in action. Pressing the doorbell completes a circuit that triggers a chime or bell.
Elevators: The buttons inside an elevator cabin are pushbuttons that send signals to the elevator's control system to move to the selected floor.
Home Appliances: Devices like microwaves, washing machines, and toasters often use pushbuttons to select functions, start processes, or stop them.
Computers and Peripherals: Keyboards, mice, and other input devices use pushbuttons to register user input.
Automobiles: Modern cars use pushbuttons for various functions, including starting the engine, controlling windows, and operating entertainment systems.
Each of these examples demonstrates the versatility and importance of pushbuttons in modern electronics.
Section 1: What is a Pushbutton?
Definition
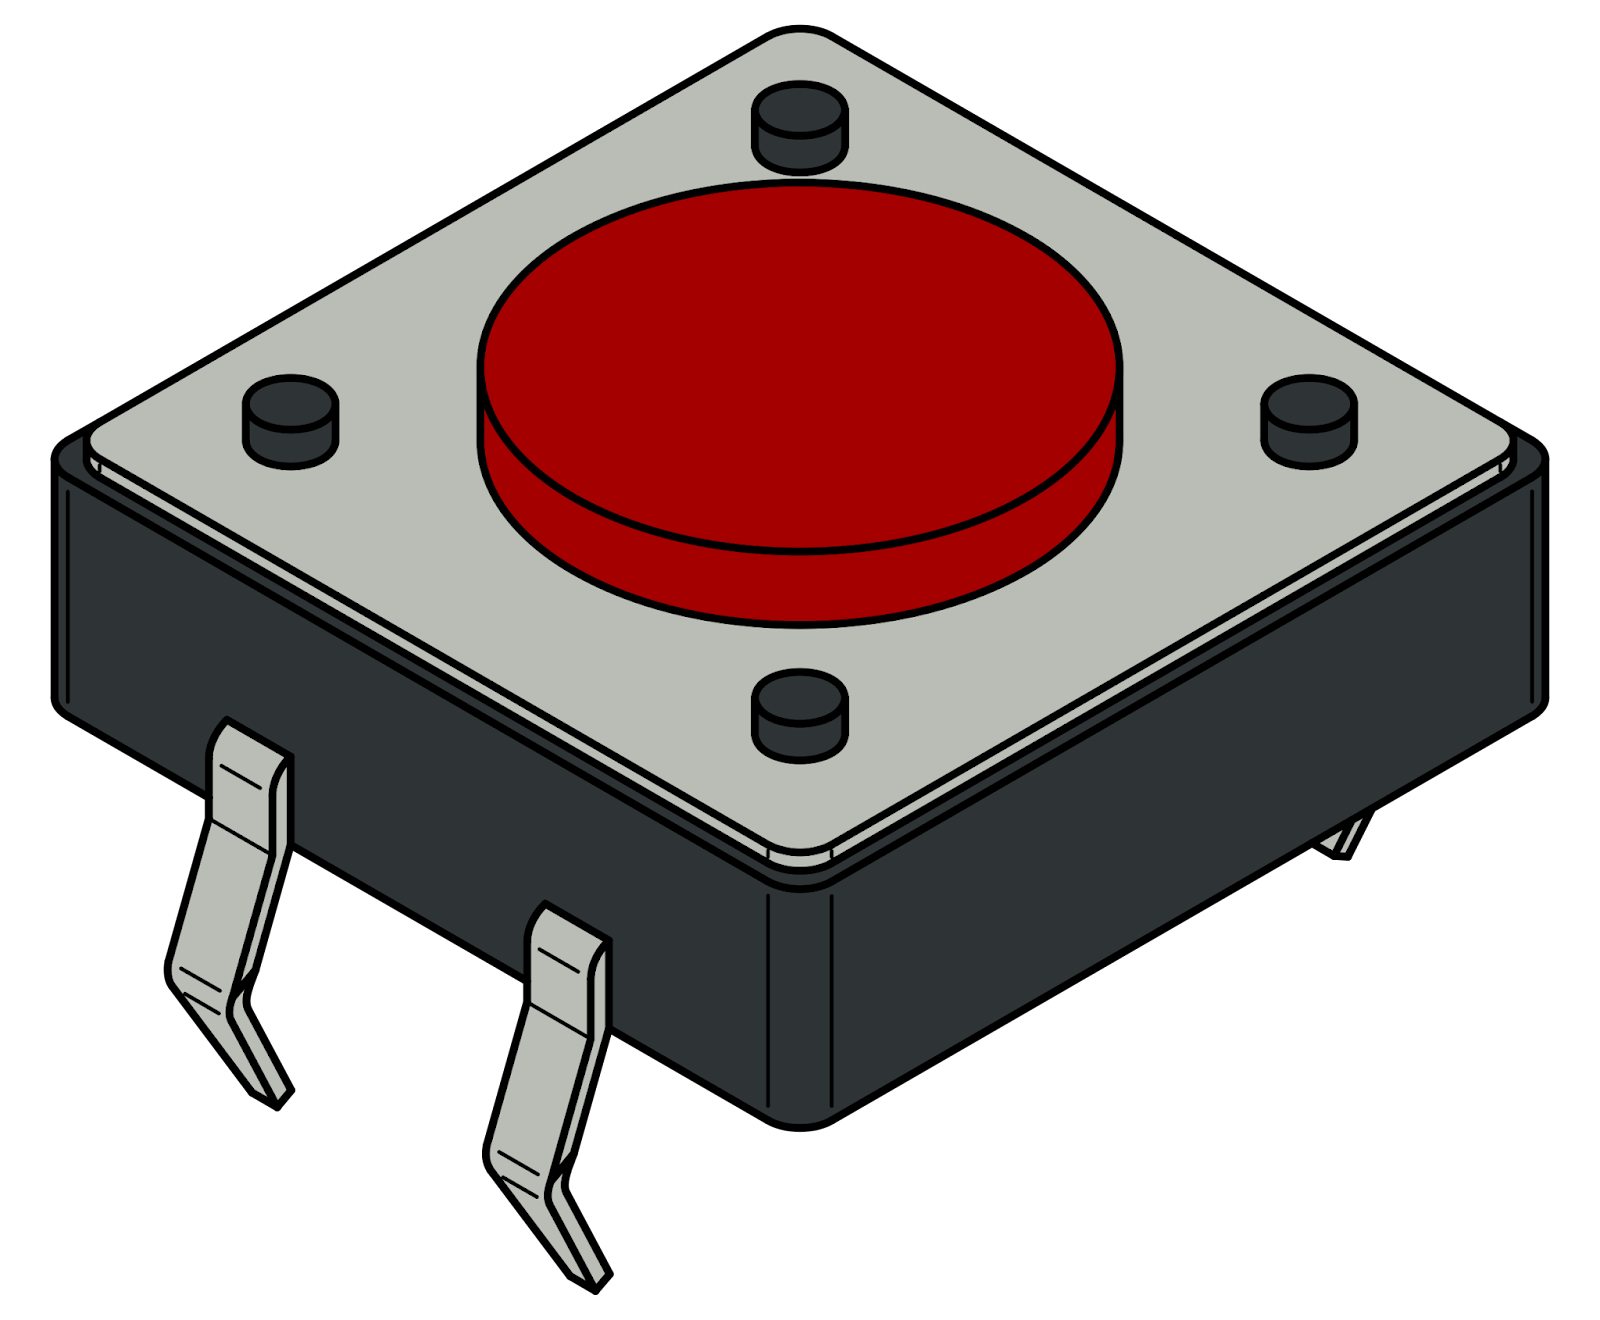
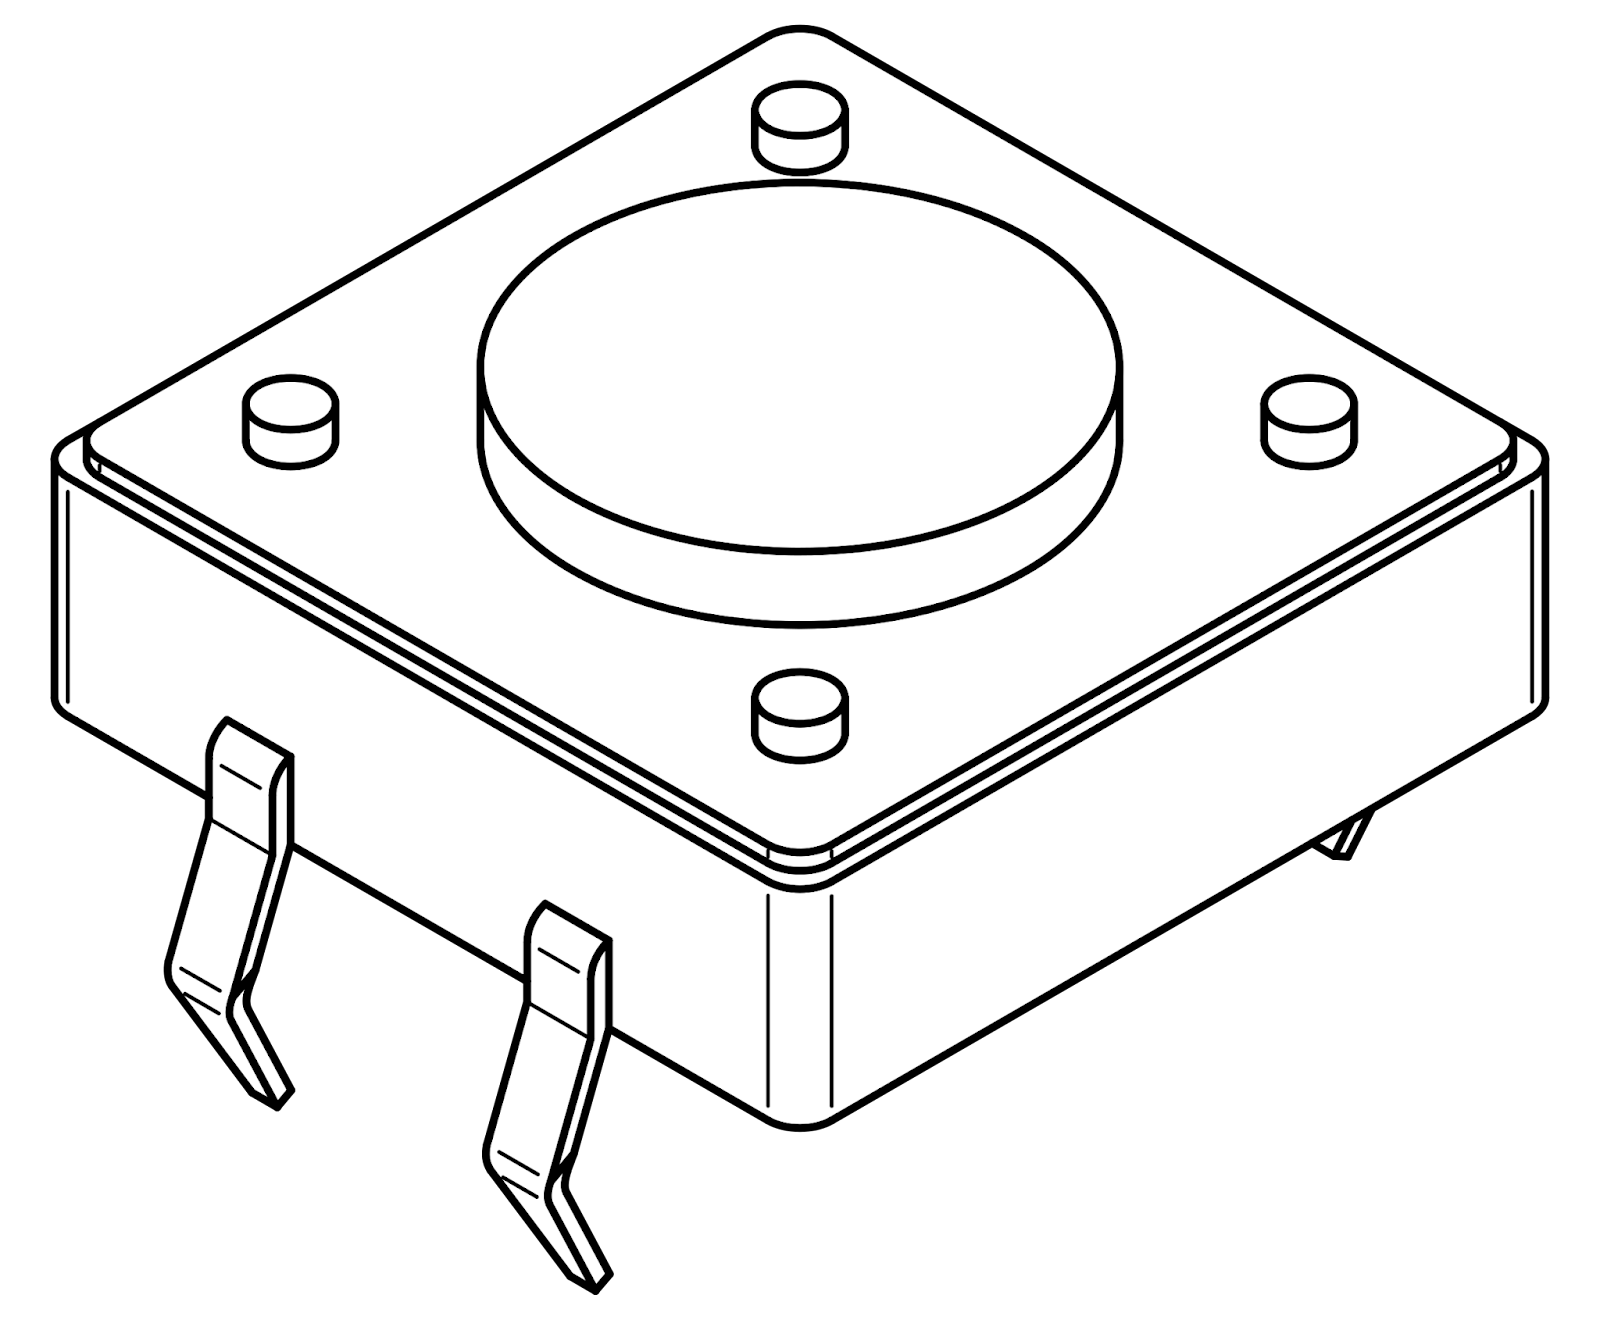
A pushbutton is an electromechanical switch designed to complete or break an electrical circuit when pressed. It consists of several components, including a housing, a spring mechanism, and metal contacts. The primary function of a pushbutton is to either allow or prevent the flow of electricity in a circuit, depending on whether it is pressed or released.
Pushbuttons are usually momentary switches, meaning they only remain in their active state while being pressed. When the user releases the button, the internal spring mechanism returns it to its default position, breaking the circuit. This momentary nature of most pushbuttons makes them ideal for applications where temporary control is needed.
Basic Function
The basic function of a pushbutton is to control the flow of electricity in a circuit. When a pushbutton is pressed, it closes the circuit by bringing two conductive parts into contact, allowing current to flow. This action can power a device, send a signal, or perform any number of functions depending on the design of the circuit.
For example, in a simple circuit with a pushbutton and an LED, pressing the button allows current to flow through the LED, causing it to light up. Releasing the button breaks the circuit, turning off the LED. This basic operation illustrates how pushbuttons can be used to control electronic devices.
Analogy
To help understand how a pushbutton works, consider the analogy of a light switch. Just as flipping a light switch completes a circuit to turn on a light, pressing a pushbutton completes a circuit to power a device or send a signal. However, while a light switch typically stays in the on or off position until flipped again, a pushbutton is usually a momentary switch, returning to its default state when released.
Another analogy is the doorbell. Pressing the doorbell button completes a circuit that sends electricity to a chime or bell, producing sound. When you release the button, the circuit breaks, and the sound stops. This is similar to how a pushbutton operates in an electronic circuit.
Section 2: Types of Pushbuttons
Momentary Pushbuttons
Momentary pushbuttons are the most common type of pushbutton. They only remain active while the button is being pressed. The momentary nature of these buttons makes them ideal for applications where a temporary action is needed, such as sending a signal, activating a device, or initiating a process.
Examples of Momentary Pushbuttons:
Keyboard Keys: Each key on a keyboard is a momentary pushbutton that sends a specific signal to the computer when pressed.
Doorbells: The button on a doorbell is a momentary pushbutton that activates the chime while it is pressed.
Reset Buttons: Many electronic devices have a reset button that must be held down for a few seconds to restart the system.
Maintained Pushbuttons
Maintained pushbuttons, also known as latching or toggle pushbuttons, stay in their last position until pressed again. Pressing the button once closes the circuit, and it remains closed even after you release the button. Pressing it again opens the circuit.
Examples of Maintained Pushbuttons:
Power Buttons on Devices: Some older televisions and other appliances have maintained pushbuttons that stay in the "on" position until pressed again to turn off.
Light Switches: Although not always a pushbutton in the traditional sense, some light switches operate similarly to maintained pushbuttons, staying in the on or off position until toggled.
Illuminated Pushbuttons
Illuminated pushbuttons include an internal light source, such as an LED, that lights up when the button is pressed or when the device is powered on. These pushbuttons are often used in applications where visual feedback is important.
Examples of Illuminated Pushbuttons:
Arcade Machines: The buttons on arcade machines often light up to indicate they are active or to attract attention.
Control Panels: In industrial settings, illuminated pushbuttons are used on control panels to indicate the status of various systems.
Capacitive Pushbuttons
Capacitive pushbuttons use the capacitance of the human body to detect when they are pressed. These buttons do not require physical force to operate, making them ideal for sleek, modern designs.
Examples of Capacitive Pushbuttons:
Touchscreen Devices: Many touchscreen devices use capacitive pushbuttons, where the screen detects the user's touch to operate various functions.
Smartphones: The home button on older smartphones is often a capacitive pushbutton that responds to the touch of your finger.

Tactile Pushbuttons
Tactile pushbuttons provide physical feedback, often a "click," when pressed. This feedback helps users know that the button has been successfully pressed, which can be important in environments where visual confirmation is difficult.
Examples of Tactile Pushbuttons:
Mechanical Keyboards: Many mechanical keyboards use tactile pushbuttons that provide a satisfying click when pressed.
Industrial Controls: In environments where users need to operate controls without looking, tactile pushbuttons provide necessary feedback.
Section 3: How Pushbuttons Work
Internal Mechanism
The internal mechanism of a pushbutton is relatively simple but crucial to its operation. When a pushbutton is pressed, a conductive metal part inside the button is pushed into contact with two other metal parts, completing the circuit. This mechanism typically involves a spring, which ensures that the button returns to its original position when released, breaking the circuit.
In more advanced pushbuttons, such as illuminated or capacitive ones, additional components are included. For example, an illuminated pushbutton might have an LED built into the housing, with separate contacts for the LED circuit. Capacitive pushbuttons may include a small circuit board that detects changes in capacitance when touched.
Electrical Connection
Pushbuttons work by either completing or breaking an electrical circuit. When you press the button, it connects two points in the circuit, allowing current to flow. This action can trigger a variety of responses, depending on the design of the circuit. For instance, in a simple circuit, pressing the pushbutton might complete a circuit that powers an LED, causing it to light up.
The electrical connection made by a pushbutton can either be normally open (NO) or normally closed (NC). In a normally open configuration, the circuit is open (disconnected) when the button is not pressed, and pressing the button closes the circuit. In a normally closed configuration, the circuit is closed (connected) when the button is not pressed, and pressing the button opens the circuit.
Common Terms
Understanding the operation of pushbuttons also involves familiarizing yourself with some common terms:
Normally Open (NO): A pushbutton configuration where the circuit is open when the button is not pressed. Pressing the button closes the circuit.
Normally Closed (NC): A pushbutton configuration where the circuit is closed when the button is not pressed. Pressing the button opens the circuit.
Debounce: A term used to describe the process of eliminating the noise or false signals caused by the mechanical contacts of a pushbutton bouncing when pressed or released.
Pole: Refers to the number of separate circuits that a switch can control. A single-pole switch controls one circuit, while a double-pole switch controls two circuits.
Throw: Refers to the number of positions that each pole can connect to. For example, a single-throw switch connects to only one output, while a double-throw switch can connect to two.
Debouncing Pushbuttons
When a pushbutton is pressed or released, the metal contacts inside can "bounce" briefly, causing multiple unwanted electrical signals. This phenomenon, known as "contact bounce" or "switch bounce," can lead to erratic behavior in electronic circuits, especially in digital systems where precise timing is critical.
To counteract this, a process called "debouncing" is used. Debouncing can be achieved through hardware, using capacitors or resistors, or through software, by programming a delay in the microcontroller that ignores further signals from the pushbutton for a brief period after the initial press.
Visualizing Debouncing
To visualize debouncing, imagine pressing a pushbutton connected to an LED. Without debouncing, the LED might flicker multiple times when the button is pressed due to the bouncing of the contacts. With debouncing, the LED would light up smoothly with a single press.
Diagrams of Pushbutton Internals
To better understand the internal workings of pushbuttons, consider studying diagrams that show the different components inside a pushbutton. These diagrams can illustrate how pressing the button moves the internal parts to complete the circuit, as well as how the spring mechanism ensures the button returns to its original position.
Diagrams can also show the differences between normally open and normally closed configurations, providing a visual reference for how each type of pushbutton operates within a circuit.
Section 4: Specifications and Values
Key Specifications
When selecting a pushbutton for your project, understanding its specifications is crucial. The two most important specifications are voltage rating and current rating.
Voltage Rating: The voltage rating indicates the maximum voltage the pushbutton can handle without being damaged. Exceeding this voltage can cause the pushbutton to fail or even become a safety hazard.
Current Rating: The current rating specifies the maximum current that can safely pass through the pushbutton. Using a pushbutton with a current rating lower than the circuit requires can lead to overheating and potential failure.
Other important specifications include the type of contacts (normally open or normally closed), the mechanical lifespan (how many cycles of pressing and releasing the button it can withstand), and the environmental ratings, such as water resistance or temperature tolerance.
Contact Configuration
Pushbuttons come in various contact configurations, which determine how they interact with the circuit:
Single-Pole Single-Throw (SPST): This is the simplest type of switch, with one input and one output. It either completes or breaks the circuit when pressed.
Single-Pole Double-Throw (SPDT): This switch has one input and two outputs. It can switch between two circuits, making it useful in applications where you need to alternate between two functions.
Double-Pole Single-Throw (DPST): This switch has two inputs and one output for each input, allowing it to control two circuits simultaneously with a single press.
Double-Pole Double-Throw (DPDT): This switch has two inputs and two outputs for each input, allowing it to control two separate circuits with two different functions.
Each configuration has specific uses in electronic circuits. Understanding these configurations helps you choose the right pushbutton for your project.
Choosing the Right Pushbutton
Choosing the right pushbutton involves considering several factors, including the type of circuit, the desired functionality, and the environment in which the pushbutton will be used. Here are some tips:
Determine the Required Specifications: Identify the voltage and current requirements of your circuit. Ensure the pushbutton you choose can handle these specifications.
Select the Appropriate Contact Configuration: Choose a configuration (SPST, SPDT, etc.) that matches the needs of your circuit.
Consider the Environment: If the pushbutton will be used in harsh environments, such as outdoors or in industrial settings, look for pushbuttons with high durability and environmental ratings.
Test the Pushbutton: If possible, test the pushbutton in a similar circuit to ensure it meets your needs before finalizing your selection.
Advanced Specifications
For more complex projects, additional specifications might be relevant:
Actuation Force: The amount of force required to press the button. This is important in applications where tactile feedback is crucial.
Bounce Time: The time it takes for the pushbutton to stabilize after being pressed. Lower bounce times are desirable in digital circuits.
Insulation Resistance: The resistance between the contacts when the pushbutton is not pressed, which indicates how well the pushbutton isolates the circuit when open.
Contact Resistance: The resistance between the contacts when the pushbutton is pressed, which should be low to ensure efficient operation.
Understanding these advanced specifications can help you make more informed decisions when selecting pushbuttons for complex or sensitive applications.
Section 5: How to Operate a Pushbutton
Step-by-Step Guide
Operating a pushbutton in a circuit involves connecting it correctly and understanding how it interacts with other components. Here’s a detailed guide:
Identify the Terminals: Most pushbuttons have at least two terminals. In a basic circuit, these are usually labeled as "input" and "output" or with similar designations.
Connect the Input: Attach the positive end of your power source to the input terminal of the pushbutton.
Connect the Output: Attach the other terminal to the input of the device you want to control, such as an LED or a motor.
Complete the Circuit: Connect the negative end of the power source to the other terminal of the device, ensuring that the circuit is complete.
Test the Circuit: Press the pushbutton. If everything is connected correctly, the device should activate (e.g., the LED should light up).
For more complex circuits, you might need to connect multiple pushbuttons in series or parallel, depending on the desired outcome. Understanding how these connections affect the circuit is essential for designing more advanced projects.
Example Project: Pushbutton-Controlled LED Circuit
To put this into practice, let’s build a simple pushbutton-controlled LED circuit. This project will demonstrate the basic operation of a pushbutton and how it can control an electronic device.
Materials Needed:
Breadboard
LED
220-ohm resistor
Pushbutton
Battery (e.g., 9V) and battery clip
Connecting wires
Instructions:
Set Up the Breadboard: Place the LED on the breadboard, with the longer leg (anode) connected to a row.
Add the Resistor: Connect the 220-ohm resistor from the same row as the LED’s anode to the positive rail of the breadboard.
Connect the Pushbutton: Place the pushbutton on the breadboard, with one terminal connected to the same row as the LED’s cathode (shorter leg).
Complete the Circuit: Connect the other terminal of the pushbutton to the negative rail of the breadboard.
Power the Circuit: Connect the battery, with the positive lead to the positive rail and the negative lead to the negative rail.
Test the Circuit: Press the pushbutton. The LED should light up when the button is pressed and turn off when released.
Advanced Project: Pushbutton-Controlled Motor
For a more advanced project, consider controlling a small DC motor with a pushbutton. This project introduces the concept of using a pushbutton to control more complex devices.
Materials Needed:
Breadboard
DC motor
Diode (to prevent back EMF from the motor)
Pushbutton
Transistor (e.g., NPN transistor) to amplify the current
Battery (e.g., 9V) and battery clip
Connecting wires
Instructions:
Set Up the Transistor: Place the NPN transistor on the breadboard. Connect the collector to one terminal of the motor.
Add the Diode: Place a diode across the motor terminals, with the anode connected to the transistor collector and the cathode to the other motor terminal. This diode protects the circuit from the voltage spike caused by the motor’s inductance.
Connect the Motor: Connect the other motor terminal to the positive rail of the breadboard.
Wire the Pushbutton: Connect one terminal of the pushbutton to the base of the transistor through a current-limiting resistor (e.g., 1k ohm). Connect the other terminal of the pushbutton to the positive rail.
Complete the Circuit: Connect the emitter of the transistor to the negative rail of the breadboard.
Power the Circuit: Connect the battery, with the positive lead to the positive rail and the negative lead to the negative rail.
Test the Circuit: Press the pushbutton. The motor should start running when the button is pressed and stop when released.
This project introduces the concept of using a transistor to control higher-current devices, like motors, which cannot be directly controlled by the pushbutton due to its current limitations.
Visual Guide
Including diagrams or photos can greatly help in understanding these projects. A diagram showing the connections on the breadboard, the placement of the pushbutton, and how the circuit is powered would be beneficial. Additionally, step-by-step photos of the assembly process can provide a clear visual guide for beginners.
Section 6: Common Issues and Troubleshooting
Common Problems
Pushbuttons, like all mechanical components, can experience issues over time. Understanding these common problems and how to troubleshoot them is essential for maintaining reliable operation in your circuits.
Sticky Buttons: This occurs when the pushbutton does not return to its original position after being pressed. It might be due to dirt, debris, or wear inside the button. Sticky buttons can lead to unintentional circuit activation or failure to activate. Cleaning the button or replacing it usually resolves the issue.
Worn Contacts: Over time, the internal contacts of a pushbutton can wear out, leading to inconsistent performance or complete failure. Worn contacts can cause intermittent connections, making the circuit behave unpredictably. If you notice that the pushbutton only works when pressed at certain angles or with varying pressure, the contacts may be worn out, and replacing the pushbutton is the best solution.
Unresponsive Buttons: Sometimes, a pushbutton may not respond at all when pressed. This could be due to several factors, including a faulty button, poor connections, or issues in the circuit. Unresponsive buttons require systematic troubleshooting to diagnose the root cause.
Troubleshooting Tips
When encountering issues with pushbuttons, use the following troubleshooting steps to identify and resolve the problem:
Inspect the Physical Condition: Check the pushbutton for any visible signs of damage, such as cracks, corrosion, or dirt. If the button appears dirty, clean it gently with a soft brush or compressed air.
Check the Connections: Ensure that all wires and connections to the pushbutton are secure. Loose or poorly connected wires can cause intermittent or unresponsive behavior.
Test the Pushbutton: Use a multimeter to test the pushbutton’s functionality. Set the multimeter to continuity mode and connect it to the pushbutton terminals. When the button is pressed, the multimeter should beep or show a low resistance reading, indicating that the circuit is closed. If there is no response, the pushbutton may be faulty.
Debounce the Button: If you experience multiple signals when pressing the button, you may need to implement debouncing. This can be done through hardware (e.g., adding a capacitor) or software (e.g., introducing a small delay in your microcontroller code).
Test the Circuit: If the pushbutton works correctly when tested with a multimeter, the issue may be elsewhere in the circuit. Check other components and connections to ensure they are functioning properly.
Replacing a Pushbutton
If troubleshooting reveals that the pushbutton is faulty, replacing it is usually straightforward. Make sure to choose a replacement that matches the specifications of the original pushbutton, including voltage and current ratings, contact configuration, and size. After replacing the pushbutton, retest the circuit to ensure the issue is resolved.
Preventive Maintenance
To avoid issues with pushbuttons, consider the following preventive maintenance tips:
Keep Pushbuttons Clean: Regularly clean pushbuttons, especially in environments with dust or moisture, to prevent dirt buildup that can cause sticky buttons or wear.
Use Appropriate Pushbuttons for the Environment: In harsh environments, use pushbuttons with protective ratings, such as IP67, which indicates dust-tight and water-resistant properties.
Avoid Excessive Force: Press pushbuttons with appropriate force. Excessive force can damage the internal mechanism or contacts, leading to premature failure.
Understanding and addressing common issues with pushbuttons ensures the longevity and reliability of your electronic projects.
Section 7: Practical Applications
Everyday Uses
Pushbuttons are used in countless devices across various industries, highlighting their versatility and importance. Here are some common applications:
Consumer Electronics: Pushbuttons are found in nearly all consumer electronics, including televisions, remote controls, smartphones, and home appliances. They provide users with an intuitive way to interact with devices, such as turning them on or off, adjusting settings, or selecting functions.
Industrial Equipment: In industrial settings, pushbuttons are used to control machinery, initiate processes, and trigger emergency stops. These pushbuttons are often designed for durability and reliability, capable of withstanding harsh environments and frequent use.
Automotive Applications: Modern vehicles use pushbuttons for various functions, including starting the engine, controlling windows and locks, and operating infotainment systems. Pushbuttons in cars are designed for ease of use and are often integrated into touch-sensitive panels.
Medical Devices: In medical equipment, pushbuttons are used to operate diagnostic tools, control patient monitoring systems, and manage life-support devices. The reliability and precision of pushbuttons in these applications are critical, as they directly impact patient care.
DIY Projects
Pushbuttons are ideal components for DIY electronics projects, especially for beginners. Here are some project ideas that incorporate pushbuttons:
Basic Alarm System: Build a simple alarm system using a pushbutton, a buzzer, and a microcontroller like Arduino. The pushbutton acts as a trigger, activating the buzzer when pressed. This project teaches the basics of input/output control and can be expanded with additional features, such as adding a delay or using a different trigger mechanism.
Interactive LED Display: Create an interactive LED display that changes patterns or colors when different pushbuttons are pressed. This project involves connecting multiple LEDs and pushbuttons to a microcontroller and programming it to respond to user inputs. It’s a great way to learn about controlling multiple components and creating interactive systems.
DIY Game Controller: Design a custom game controller using pushbuttons and a microcontroller. The pushbuttons can be mapped to different game functions, such as moving, jumping, or shooting. This project allows for creativity in designing the layout and function of the controller, providing a hands-on understanding of how commercial controllers work.
Music Synthesizer: Build a simple music synthesizer using pushbuttons and a microcontroller. Each pushbutton can be programmed to produce a different tone or sound when pressed, allowing you to create music or sound effects. This project introduces basic concepts of sound generation and digital signal processing.
Remote Control System: Create a remote control system using pushbuttons and a wireless module, such as an RF or Bluetooth module. The pushbuttons can send signals to control different devices remotely, such as turning on lights, opening doors, or adjusting the thermostat. This project combines pushbutton control with wireless communication, offering insights into how modern remote control systems work.
Advanced Applications
For more experienced electronics enthusiasts, pushbuttons can be integrated into complex systems, such as:
Home Automation Systems: Pushbuttons can be used in home automation systems to control lighting, heating, and security systems. Integrating pushbuttons with smart home platforms allows for customizable control of various devices and appliances.
Robotics: In robotics, pushbuttons can be used as inputs for controlling robotic arms, starting and stopping tasks, or switching between modes. Pushbuttons can be combined with sensors and microcontrollers to create interactive and responsive robotic systems.
Wearable Technology: Pushbuttons can be incorporated into wearable technology, such as smartwatches or fitness trackers. These pushbuttons often need to be small, durable, and water-resistant, designed to withstand daily wear and tear while providing reliable input for the user.
Encouragement to Experiment
Experimenting with pushbuttons in different projects helps you understand their versatility and potential. Whether you're building simple circuits or designing complex systems, pushbuttons provide a reliable and intuitive interface for user interaction. As you become more comfortable with pushbuttons, you can explore more advanced topics, such as integrating them with microcontrollers, using them in wireless communication systems, or designing custom interfaces.
Conclusion
Recap
In this comprehensive tutorial, we’ve explored the world of pushbuttons, from the basics of what they are and how they work to more advanced topics such as different types of pushbuttons, their internal mechanisms, and practical applications. Pushbuttons are a fundamental component in electronics, and understanding how to use them effectively is a valuable skill for any electronics enthusiast.
We’ve also provided detailed guides on how to operate pushbuttons in circuits, including step-by-step projects for building pushbutton-controlled devices. Troubleshooting tips and common issues were discussed to help you maintain and repair pushbuttons in your projects. Finally, we explored the wide range of practical applications for pushbuttons, from everyday consumer electronics to advanced DIY projects and industrial systems.
Next Steps
Now that you have a solid understanding of pushbuttons, it’s time to put that knowledge into practice. Start by experimenting with simple circuits and gradually move on to more complex projects. As you gain experience, you can explore advanced topics such as integrating pushbuttons with microcontrollers, using them in wireless communication systems, or designing custom interfaces for your projects.
Consider diving deeper into related topics such as circuit design, microcontroller programming, and user interface design. These skills will complement your knowledge of pushbuttons and open up new possibilities for your electronics projects.
Resources
For further learning and exploration, here are some recommended resources:
Books: "Practical Electronics for Inventors" by Paul Scherz and Simon Monk, "Make: Electronics" by Charles Platt.
Online Tutorials: Websites like Adafruit, SparkFun, and Instructables offer a wide range of tutorials on electronics and pushbuttons.
Electronics Kits: Consider purchasing an electronics starter kit that includes pushbuttons, LEDs, resistors, and other components for hands-on learning.
Appendix
Glossary of Terms
Circuit: A closed path through which electricity flows, typically including a power source, conductors, and electronic components.
Normally Open (NO): A contact configuration where the circuit is open (not connected) when the pushbutton is not pressed. Pressing the button closes the circuit.
Normally Closed (NC): A contact configuration where the circuit is closed (connected) when the pushbutton is not pressed. Pressing the button opens the circuit.
Debounce: The process of eliminating noise or false signals caused by the mechanical contacts of a pushbutton bouncing when pressed or released.
Pole: Refers to the number of separate circuits that a switch can control. A single-pole switch controls one circuit, while a double-pole switch controls two circuits.
Throw: Refers to the number of positions that each pole can connect to. For example, a single-throw switch connects to only one output, while a double-throw switch can connect to two.
FAQs
What is the difference between momentary and maintained pushbuttons?
Momentary pushbuttons only stay active while pressed, whereas maintained pushbuttons stay in their last position until pressed again.
How do I choose the right pushbutton for my project?
Consider the voltage and current ratings, contact configuration, and whether you need a momentary or maintained action.
Why is my pushbutton not working?
Check the wiring, test the pushbutton with a multimeter, and inspect for any debris or damage.
What is debouncing, and why is it necessary?
Debouncing is the process of eliminating false signals caused by contact bounce in pushbuttons. It is necessary to ensure reliable and accurate input in digital circuits.
Troubleshooting Checklist
Ensure all connections are secure.
Test the pushbutton with a multimeter.
Inspect the pushbutton for dirt or debris.
Replace the pushbutton if it is worn out.
Consider debouncing techniques if experiencing erratic behavior.


No comments